The Ultimate Vendomnia Rowing Machine Assembly Manual: Step-by-Step Instructions
Rowing is not only one of the most effective forms of exercise, but also an excellent way to increase endurance and muscle tone. If you have decided to Vendomnia rowing machine Before purchasing a rowing machine, you may be faced with the challenge of assembling the machine correctly. In this article, we provide a comprehensive step-by-step guide to help you assemble your rowing machine with ease.
Why a rowing machine from Vendomnia?
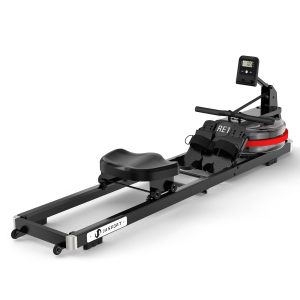
The Vendomnia rowing machine has earned a reputation for its quality, ease of use, and wide range of features. Whether for beginners or experienced athletes, it offers the right training experience for everyone. But before you can enjoy the benefits, you first need to set it up properly.
what you need
- The Vendomnia rowing machine packaging
- Hand wrench (if not included)
- The complete instructions included with the product
- Some space and patience
Step 1: Unpacking the rowing machine
Start by carefully opening the package. Check all parts according to the enclosed parts list. Make sure no parts are missing. If you find anything missing, contact Vendomnia Customer Service immediately.
Step 2: Assemble the base frame
The base frame is the foundation of your rowing machine. Make sure the footrest mount is facing forward. Connect the two base legs using the included screws. Tighten the screws firmly, but do not overtighten them to prevent the material from breaking.
Step 3: Mount the rudder arm
Take the rowing arm and insert it into the designated bracket. Make sure the joints are correctly aligned and the arm moves smoothly. Use the appropriate screws and tighten them. The rowing arm must be securely attached to ensure safe training.
Step 4: Seat and rail
Now it's time to assemble the seat. Mount the seat on the rail using the provided clips. Make sure the seat slides up and down smoothly and there's no friction.
Step 5: Attach footrests
The footrests are crucial for an effective rowing stroke. Make sure they are securely attached and at the correct height to avoid injury. They should also be adjustable so you can adjust the footrests to your shoe size.
Step 6: Adjust the resistance system
Resistance is an important component of your rowing machine. Check that the resistance system is installed correctly and test different resistance levels to ensure functionality. This allows you to customize your workout to your fitness level.
Step 7: Set up electronics and display
The display is a central element of your rowing machine, showing you workout data such as time, distance traveled, and calories burned. Connect the electronics according to the instructions and test the display to ensure it's working properly.
Tips for using your rowing machine
After successfully assembling your Vendomnia rowing machine, remember to warm up before each workout. Maintain proper rowing technique to avoid injury and get the most out of your workout. Regular maintenance and cleaning of the machine will help extend its lifespan. If you encounter any problems, please refer to the manual or contact Vendomnia technical support.
Conclusion: Success through careful construction
Assembling your Vendomnia rowing machine doesn't have to be complicated if you follow the instructions step by step. With patience and diligence, you'll not only successfully assemble the machine but also lay an excellent foundation for your future fitness program. Incorporate rowing into your weekly routine to reap the many benefits of this effective form of exercise.